
Nut butter is one of those quietly magical foods. It’s humble, spreadable, endlessly customizable, and—when made well—astonishingly luxurious. Making your own nut butter at home turns a pantry staple into a personal craft. You control the ingredients, the texture, the roast level, the flavor profile, and even the aroma that fills your kitchen. What begins as a handful of nuts becomes a silky paste that can anchor breakfasts, enrich sauces, and elevate desserts.
This guide is designed to be both practical and deeply informative. We’ll explore the science of nut butter, the tools that matter, the techniques that make the difference between gritty and glorious, and the creative directions you can take once you master the basics. The goal is not just to tell you how to make nut butter, but to help you understand why each step works—so you can adapt, innovate, and enjoy the process.
1. What Exactly Is Nut Butter?
At its core, nut butter is a suspension of finely ground nut solids in their own released oils. Nuts are rich in fats, proteins, carbohydrates, and micronutrients. When you grind them long enough, the cell walls rupture, oils are released, and friction-generated heat helps transform dry particles into a smooth paste.
This process is deceptively simple. There’s no need for emulsifiers, stabilizers, or added oils if your technique is correct. The nuts themselves provide everything required. The challenge—and the art—lies in guiding the transformation.
Nut butters can be:
- Single-ingredient (just nuts)
- Lightly seasoned (salt, sugar, spices)
- Sweet or savory
- Smooth or crunchy
- Pourable or spoon-standing
Understanding the mechanics allows you to achieve any of these with intention.
2. Why Make Nut Butter at Home?
Ingredient Control
Commercial nut butters often contain added sugars, refined oils, stabilizers, and preservatives. Homemade nut butter can be as clean or as indulgent as you choose.
Freshness and Flavor
Freshly ground nut butter has a brightness and depth that fades over time. The natural oils haven’t oxidized, and the aromas are more vivid.
Custom Texture
Want it ultra-smooth? Leave the processor running longer. Prefer rustic and crunchy? Reserve chopped nuts and fold them in at the end.
Cost Efficiency
Buying nuts in bulk and making butter yourself can be significantly cheaper than premium store-bought varieties.
Creative Freedom
From cinnamon-almond to spicy cashew-sesame, the flavor combinations are limited only by your curiosity.
3. The Science Behind Creamy Nut Butter
To make nut butter well, it helps to understand what’s happening inside your food processor.
The Stages of Transformation
- Chopped Phase
Nuts break into coarse pieces. - Powder Phase
Continued grinding turns them into a fine, dry meal. - Clumping Phase
Oils begin to release; the powder sticks together. - Paste Phase
Oils fully disperse; the mixture becomes thick and spreadable. - Creamy Phase
Extended processing yields a smooth, glossy butter.
Many beginners stop too early, thinking something has gone wrong. Patience is often the missing ingredient.
Heat and Friction
Friction from the blades creates gentle heat, which lowers the viscosity of nut oils and helps them flow. This is why high-powered processors perform better—they maintain momentum without overheating the motor.
4. Choosing Your Nuts: A Flavor and Texture Guide
Different nuts behave differently under the blade. Their fat content, moisture level, and structure all affect the final butter.
Peanuts
- Technically legumes, but classic for nut butter
- High fat, easy to process
- Mild flavor, great base for experimentation
Almonds
- Slightly drier than peanuts
- Benefit from roasting
- Produce a thick, rich butter with a subtle sweetness
Cashews
- Very high fat
- Blend quickly into an ultra-smooth butter
- Naturally sweet and creamy
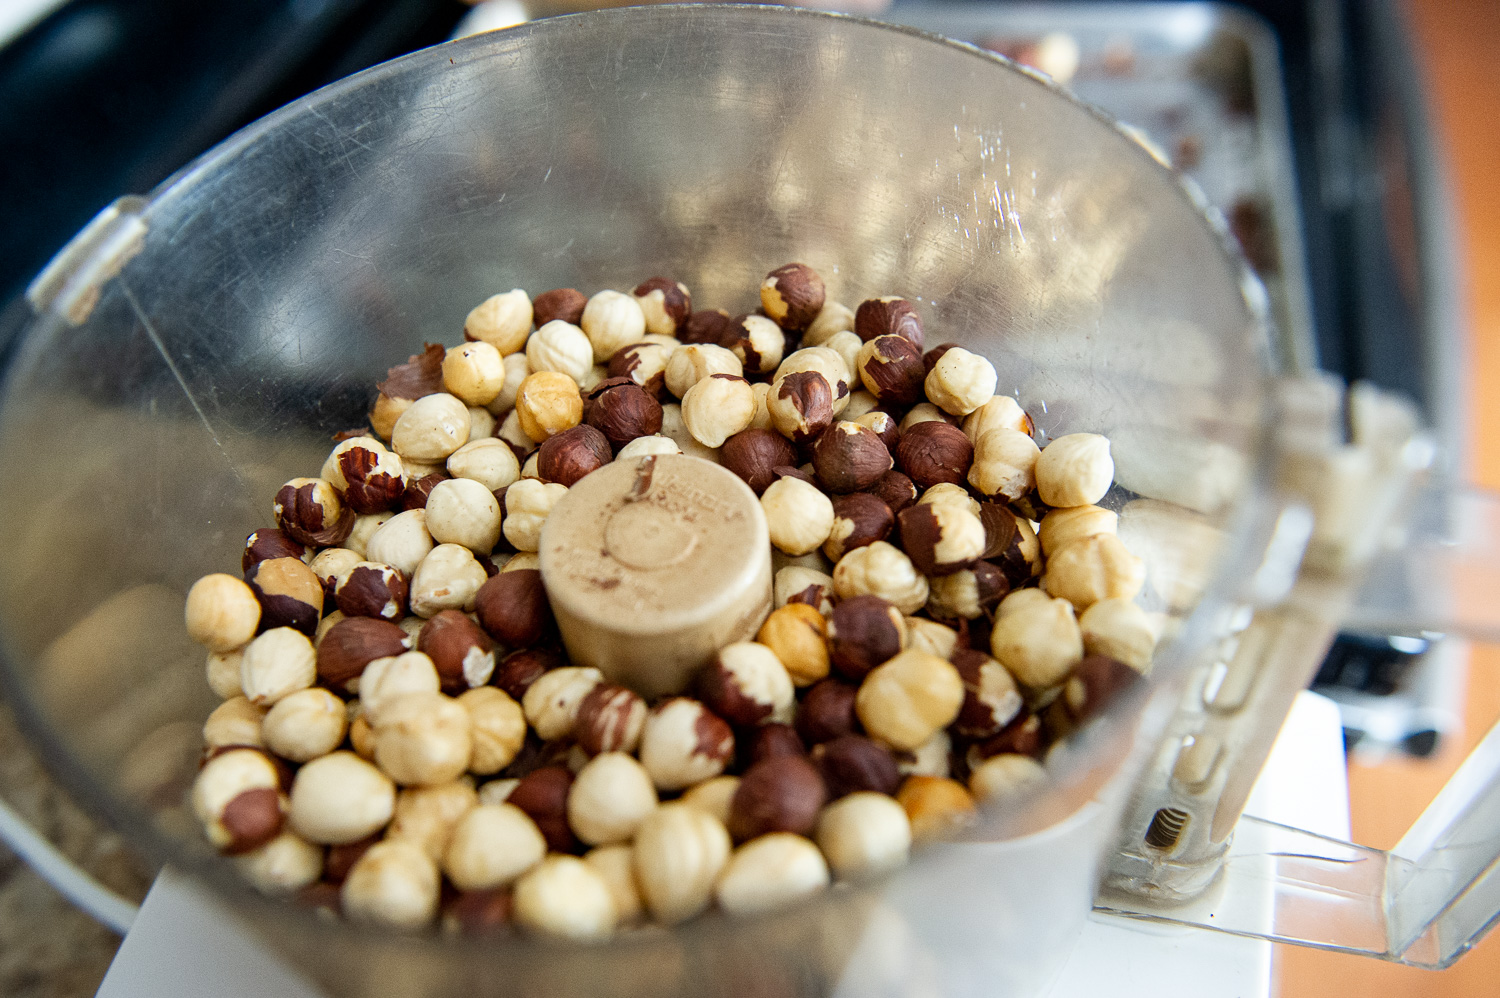
Hazelnuts
- Strong, distinctive flavor
- Pair beautifully with chocolate
- Skins can add bitterness if not removed
Walnuts
- Softer texture
- Lower stability due to delicate oils
- Best blended with other nuts or used fresh

Pecans and Macadamias
- Extremely high fat
- Yield luxurious, almost pourable butters
- Excellent for dessert applications
5. Raw vs. Roasted: The Flavor Decision
Raw Nuts
- Mild, clean taste
- Retain maximum nutrients
- Require longer processing
- Resulting butter can taste flatter
Roasted Nuts
- Deeper, more complex flavor
- Easier to blend due to released oils
- Roasting enhances sweetness and aroma
Roasting Tips:
- Roast at moderate temperatures
- Stir halfway for even color
- Cool slightly before blending (warm, not hot)
The difference between a good nut butter and a great one often starts in the oven.
6. Essential Equipment (And What You Can Skip)
Food Processor
The gold standard for home nut butter. Look for:
- Strong motor
- Sharp, durable blades
- Adequate bowl capacity
High-Speed Blender
Can work, especially for softer nuts like cashews. Requires tamping and careful monitoring.
Mortar and Pestle
Traditional, meditative, and labor-intensive. Produces rustic textures.
What You Don’t Need
- Added oil (usually unnecessary)
- Sweeteners at the start (add later if desired)
- Stabilizers
Let the nuts do the work.
7. Step-by-Step: The Classic Method
Step 1: Measure
Use enough nuts to keep the blades engaged. Too few will just bounce around.
Step 2: Roast (Optional but Recommended)
Enhances flavor and speeds blending.
Step 3: Begin Processing
Start on low, then increase speed. Scrape down the sides as needed.
Step 4: Be Patient
The mixture will look wrong before it looks right. Keep going.
Step 5: Adjust Texture
Process longer for smoothness. Stop early for a coarse finish.
Step 6: Season (Optional)
Add salt, sweeteners, or spices at the end.
8. Texture Mastery: Smooth, Crunchy, and Everything Between
Ultra-Smooth
- Longer processing
- Warm nuts
- Occasional scraping
Crunchy
- Reserve a portion of chopped nuts
- Fold in after blending

Drippy
- Process longer
- Choose high-fat nuts
Thick and Spoonable
- Shorter processing
- Drier nuts like almonds
Texture is not a mistake—it’s a choice.
9. Flavor Variations That Actually Work
Sweet Directions
- Honey and cinnamon
- Vanilla and maple
- Cocoa powder and a pinch of salt
Savory Directions
- Chili and smoked paprika
- Garlic and rosemary
- Sesame seeds and soy-inspired seasonings
Functional Add-Ins
- Chia seeds for texture
- Protein powder (added carefully)
- Toasted coconut
Always add extras gradually. Small amounts go a long way.
10. Common Problems and How to Fix Them
“It’s Too Dry”
- Keep processing
- Ensure nuts were roasted
- Add a small amount of neutral oil only if necessary
“It’s Bitter”
- Nuts may be over-roasted
- Skins (especially hazelnuts) may need removal
“It Separated”
- Natural separation is normal
- Stir before use
- Store properly
“My Processor Is Struggling”
- Pause to cool the motor
- Process in stages
- Use slightly warm nuts
11. Storage, Safety, and Shelf Life
Storage Containers
- Airtight jars
- Glass preferred
Refrigeration
- Extends freshness
- Slows oil separation
Shelf Life
- Room temperature: several weeks
- Refrigerated: several months
Always use clean utensils to avoid contamination.
12. Nutrition: What You’re Really Eating
Nut butters are nutrient-dense foods:
- Healthy fats
- Plant-based protein
- Fiber
- Vitamins and minerals
Homemade versions avoid excess sugars and oils, making them a balanced addition to many diets when enjoyed in moderation.
13. Using Nut Butter Beyond Toast
Cooking
- Stir into sauces
- Thicken soups
- Enrich curries
Baking
- Replace fats in recipes
- Swirl into brownies
- Fill pastries
Snacks
- Fruit dip
- Energy balls
- Yogurt topping
Nut butter is an ingredient, not just a spread.
14. Sustainability and Mindful Cooking
Making nut butter at home can be part of a more thoughtful kitchen:
- Buy nuts in bulk to reduce packaging
- Choose ethically sourced nuts
- Make only what you’ll use
The process encourages awareness—of ingredients, effort, and flavor.
15. Building Your Signature Nut Butter
Once you understand the fundamentals, you can develop your own style:
- Preferred nut blends
- Signature spice mixes
- Ideal textures
Your nut butter becomes a reflection of your taste and technique.
16. Final Thoughts: A Small Skill With Big Rewards
Learning how to make your own nut butter at home is a small culinary skill with outsized rewards. It teaches patience, attention, and respect for ingredients. It saves money, reduces additives, and opens the door to creativity.
Most importantly, it reconnects you with food in its simplest, most satisfying form. A handful of nuts. A bit of time. And the quiet thrill of watching something transform under your hands.
Once you’ve made your own, store-bought versions may never quite measure up.